


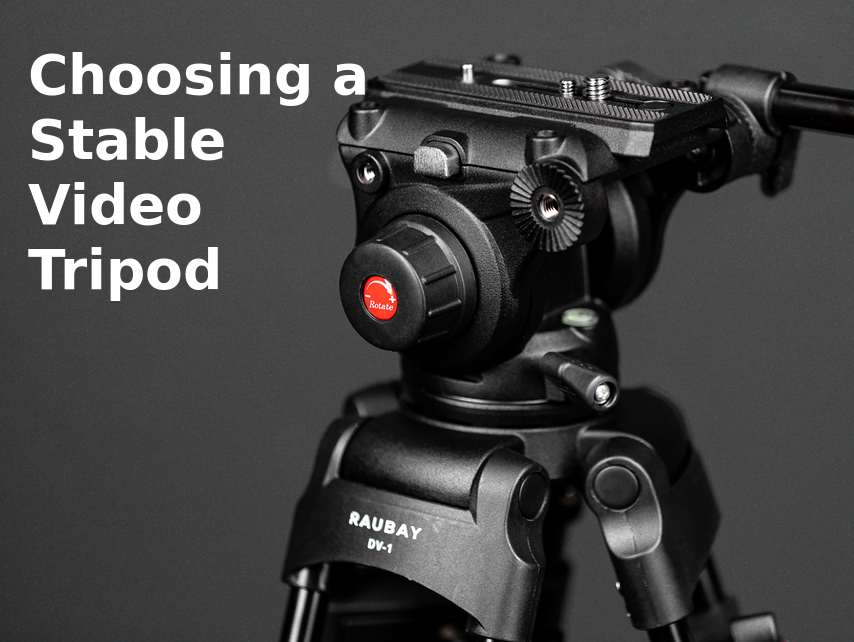
Use a stable video tripod that supports your full camera rig, stays secure on the shooting surface, and gives you controlled pan and tilt movement. Smooth footage begins with a solid camera support setup.

What Is Causing Camera Shake in Your Video Setup?
Camera shake usually comes from an unstable rig, loose tripod parts, floor movement, cable tension, or contact with the camera during recording. Find the source before changing your equipment.
A quick jolt during a pan often comes from sudden pressure on the handle. A slow shift may point to an uneven leg position or a loose lock. A cable can pull the camera off frame, while a flexible floor can move under the tripod during a take.
Check these common causes:
- A camera rig close to the tripod payload limit
- Unevenly extended legs or loose leg locks
- A long lens or monitor that shifts the rig balance
- Movement on a wood floor or raised platform
- Fast pressure on the pan handle
- Cables pulling near the camera or tripod head
- Touching the camera body during recording
Set up the full rig and record a short test clip. Watch for the first point where movement enters the frame, then correct that part of the setup.

Calculate the Payload for Your Complete Camera Rig
Your video tripod needs to carry every item mounted during recording. Add the camera body, lens, battery, cage, monitor, microphone, wireless receiver, and quick release plate before comparing the total with a tripod’s rated payload.
A camera body can feel light on its own. The full setup changes once you add a zoom lens, power system, monitor, or teleprompter. Weight distribution also matters. A front heavy lens can pull the head forward during a tilt, while a monitor mounted high can change the balance point.
Use the following checklist:
| Rig Component | Include It When Attached During Recording |
|---|---|
| Camera body | Always |
| Lens and lens support | Always |
| Battery or power adapter | When mounted or connected |
| Cage and top handle | When used |
| External monitor | When used |
| Microphone or wireless receiver | When used |
| Quick release plate | Always |
| Teleprompter or camera accessory | When used |
Leave a practical margin between the complete rig weight and the tripod’s maximum payload. A balanced camera video tripod setup gives the head a smoother feel and keeps framing more consistent through a take.

Why Does a Fluid Head Matter for Smooth Video Movement?
A fluid head adds controlled resistance to pans and tilts. The resistance helps you move the camera at a steady pace and stop with less visible jerk.
Set the drag to suit your rig. A light camera often feels best with lighter resistance. A larger camera setup may need more resistance to hold its position during a tilt. Test the movement at the speed used in your shot, since a slow product pan needs different control from a quick event shot.
A fluid head works well for:
- Slow pans across a product display
- Tilts from hands to a speaker’s face
- Interview shots that follow a speaker
- Controlled movement across a tabletop scene
- Small framing changes between takes
Smooth camera movement depends not only on the fluid head, but also on how well the tripod setup matches the shooting situation.
For different shooting conditions, the DV Tripod Series covers several common video setups.
DV-1 tripod works well for interviews, talking-head videos, classroom recordings, and product demonstrations where the camera stays in one main position but still needs occasional reframing. With a maximum height of 70.8 inches and a fluid drag head, it can accommodate both seated and standing subjects while supporting smoother pans and tilts when following a speaker or adjusting the composition.
For events, ceremonies, stage performances, or longer studio sessions, DV-2 tripod is useful when the tripod needs to remain firmly positioned while the camera follows movement across the scene. It reaches 69 inches, while its detachable ground spreader helps keep the legs evenly spaced on firm indoor floors during repeated pans or extended recording sessions.
DV-3 tripod suits shoots that require more frequent changes in camera height and angle. It extends to 70.8 inches but also supports ultra-low-angle shooting, making it more adaptable for low product shots, floor-level compositions, outdoor filming, or moving between different camera positions. Rapid leg adjustment also makes those changes easier when the setup needs to move with the shoot.

Set the Right Tripod Height for a Better Camera Angle
Set tripod height around the camera angle you want, then use the head for final framing. The legs handle the main height adjustment, while the head handles smaller angle changes.
For a talking head video, place the lens close to eye level for a natural view. Product videos often need a lower camera position near the table. Standing demonstrations may need more height to keep the subject and background in balance.
Use a simple setup order:
- Put the tripod on the shooting surface.
- Open the legs fully.
- Extend only the leg sections needed for the shot.
- Check the camera screen.
- Adjust the head for the final frame.
- Tighten each lock before recording.
Keep the camera close to the height required for the shot. A lower center of gravity gives the tripod a more settled feel, especially with a larger lens or monitor attached.
Check headroom, eye line, and frame balance after mounting every accessory. Recheck the camera position after changing lenses or adding a teleprompter.
How Do Different Ground Conditions Affect Video Tripod Stability?
Ground conditions affect how evenly a video tripod carries the camera. Check the floor before you mount the rig, especially in rooms with carpet, wood flooring, raised stages, or uneven outdoor surfaces.
A hard studio floor gives the feet a firm contact point. Carpet can hide a low spot under one foot. Wood floors can move when someone walks nearby. Outdoor soil can settle after the tripod takes the camera’s weight.
Match your setup to the surface:
- On smooth floors, test a slow pan and watch for foot movement.
- On carpet, press each foot down gently before mounting the camera.
- On wood floors, keep foot traffic away during recording.
- On outdoor ground, place each foot on firm soil and avoid loose edges.
- On raised platforms, keep every tripod foot well inside the platform boundary.
The DV-2 video tripod includes a detachable ground spreader alongside its fluid drag head, which can suit setups that need a spreader-based support layout.
Mount the full rig only after the tripod feet feel secure. Check the camera frame again after nearby movement or a change in floor traffic.

Reduce Vibration From Cables, Floors, and Camera Controls
Cables, flexible floors, and camera controls can transfer small movements into your footage. Give each cable enough slack near the camera and keep the area around the tripod clear during a take.
Route power, HDMI, audio, and monitor cables along the floor or a nearby stand. Leave a small loop near the camera so a pan or tilt can move freely. Secure the remaining cable away from tripod legs and walking paths.
Check clamps, locks, mounting points, and support hardware before raising a loaded rig. Routine support equipment inspections cover regular inspection of load-supporting equipment and mounting hardware.
Keep power cords clear of walking paths and remove visibly damaged cords from use. Extension cord safety practices cover safe cord placement and damage checks.
Use a remote app, wired remote, or self-timer when pressing the record button moves the camera. With a long lens, allow a brief pause after recording begins before you speak or move the pan handle.
Build a Repeatable Video Tripod Setup
A repeatable setup comes from recording the positions and settings that gave you a stable shot. Keep a short note with tripod leg height, camera height, lens focal length, fluid head drag, pan handle position, cable route, and subject position. Mark the tripod location on the floor when you film in the same space often. Those details help you rebuild a familiar frame after moving equipment, changing lenses, or returning for another shoot. Before your next recording, check every lock, level the camera, clear the cable path, and run a short test clip.

FAQs
Q1: What Makes a Video Tripod Different From a Photo Tripod?
A video tripod is built for controlled movement during a take. Many models use a sliding camera plate, which lets you move the rig forward or back until it reaches a better balance point. A video tripod with a fluid head also gives you a pan handle and resistance control for recorded camera movement.
Q2: When Does a Bowl Base Help With Faster Tripod Leveling?
A bowl base helps when you move between rooms or shoot on surfaces with small height changes. A 75 mm half ball lets you level the head without changing every leg position. Center the bubble level, lock the bowl mechanism, then check the frame before recording.
Q3: When Does a Ground Spreader Improve Video Tripod Stability?
A ground spreader works best on a clear, firm surface where you want the tripod legs to keep the same spacing through a long shoot. It is useful for interviews, events, and studio sessions with a fixed camera position. Check that the spreader sits flat and each foot has full contact with the floor.
Q4: How Do You Level a Video Camera Tripod on an Uneven Floor?
Level the tripod after placing each foot on firm ground. Adjust one leg at a time, check the bubble level after each change, then lock the leg sections before mounting the camera. An LB-01 leveling base provides micro adjustment for fine camera leveling. Confirm thread and payload compatibility before use.
Q5: How Does a Quick Release Plate Speed Up Repeated Video Shoots?
A quick release plate lets you return the camera to a known mounting position between shoots. Mark the plate position after balancing the full rig, then check the safety lock before every take. Keep an extra plate in your camera case when two camera bodies share the same tripod head.
Share:
How to Choose a Light Stand for a Small Home Studio